Home > Blog > Week 1 - Git Over Here!
Git Over Here!
My First Week at Awesome Inc.
This week I began the Awesome Inc Coding Bootcamp and so far I'm very impressed! I learned about an online IDE called CodeAnywhere, which is very akin to VS Code, save that it is written entirely in javascript (very cool), as well as receiving an extensive refresher on using GitHub!
I've used GitHub in the past when I was a front-end web developer, but never as in-depth as they are teaching me it can be utilized. As well as, I'm learning that the amount of things you can forget in 6 years is shocking.

6 years is a long time!
The focus of this article will be to detail out what I have learned in regards to Git and GitHub.
The Process of Utilizing GitHub
- Initialize Your Local Repository.
- Check the Status of Your Local Repository.
- Create Content to be Pushed.
- Add Files to be Committed.
- Commit Your Changes.
- Create an Empty Repository on the GitHub Server.
- Setup Your Branch.
- Assign Your Origin URL
- Push Your New Content Up to The GitHub Server.
- Create a "Dev" Branch
- Make Changes, Add, Commit, Push, Wash Rinse and Repeat.
- Execute a Pull Request on Your Content.
- Merge your changes into the main branch.
Initialize Your Local Repository
It's the simplest of things that make all the difference. This eight character command...
$ git init
...is where it all begins. With it you can "Create an empty Git repository or reinitialize an existing one." ¹ In short, it makes it possible to create branches, commit changes, push said changes up to the server, and so much more! None of this would be able to be done without first initializing a local repository.
Check The Status of Your Local Repository.
It is important to be able to see the difference between what you have on your local repo and your repo on Github. To do this you will use...
$ git status
This is a very useful command. What it does is "Show the working tree status." ² It allows you to see what is committed, what is yet to be committed and what needs to be added to be included in your next commit.

Git status output.
Create content to be pushed.
With out local repo initialized we can create some dummy content to work with. This will give us something to add, commit, and push to the GitHub server. To achieve this, all we need to do is enter the command...
$ touch README.md`
With touch we can "change file access and modification times"³ of a file. What makes this particularly useful, is that if we specify a file that does not exist, it will create it. We can confirm that it executed successfuly by issuing the command...
$ ls`
This will "list directory contents"⁴. Now that that is out of the way let's continue.
Add Files to be Committed.
Now, we will look into how to update the index with the changes we've made to the working tree. This is done with the command...
$ git add -A
This command allows us to "Add file contents to the index" ⁵. Without it Git would not know that we wanted to include the changes we've made into the next commit. The option -A lets Git know that we want it to look at all of the files that are indexed and add the ones that differ from the working tree *(eg. The files we've changed)*.
Commit Your Changes.
Okay, now that we have added our changes to the index it is time to record/commit them to the repository. This is done using the command...
$ git commit -m "message"
It's used to "Record changes to the repository" ⁶. You can see that the git commit command is followed by the option -m "message", this is used to enter a description of the changes that are being recorded to the repository.

Git commit output.
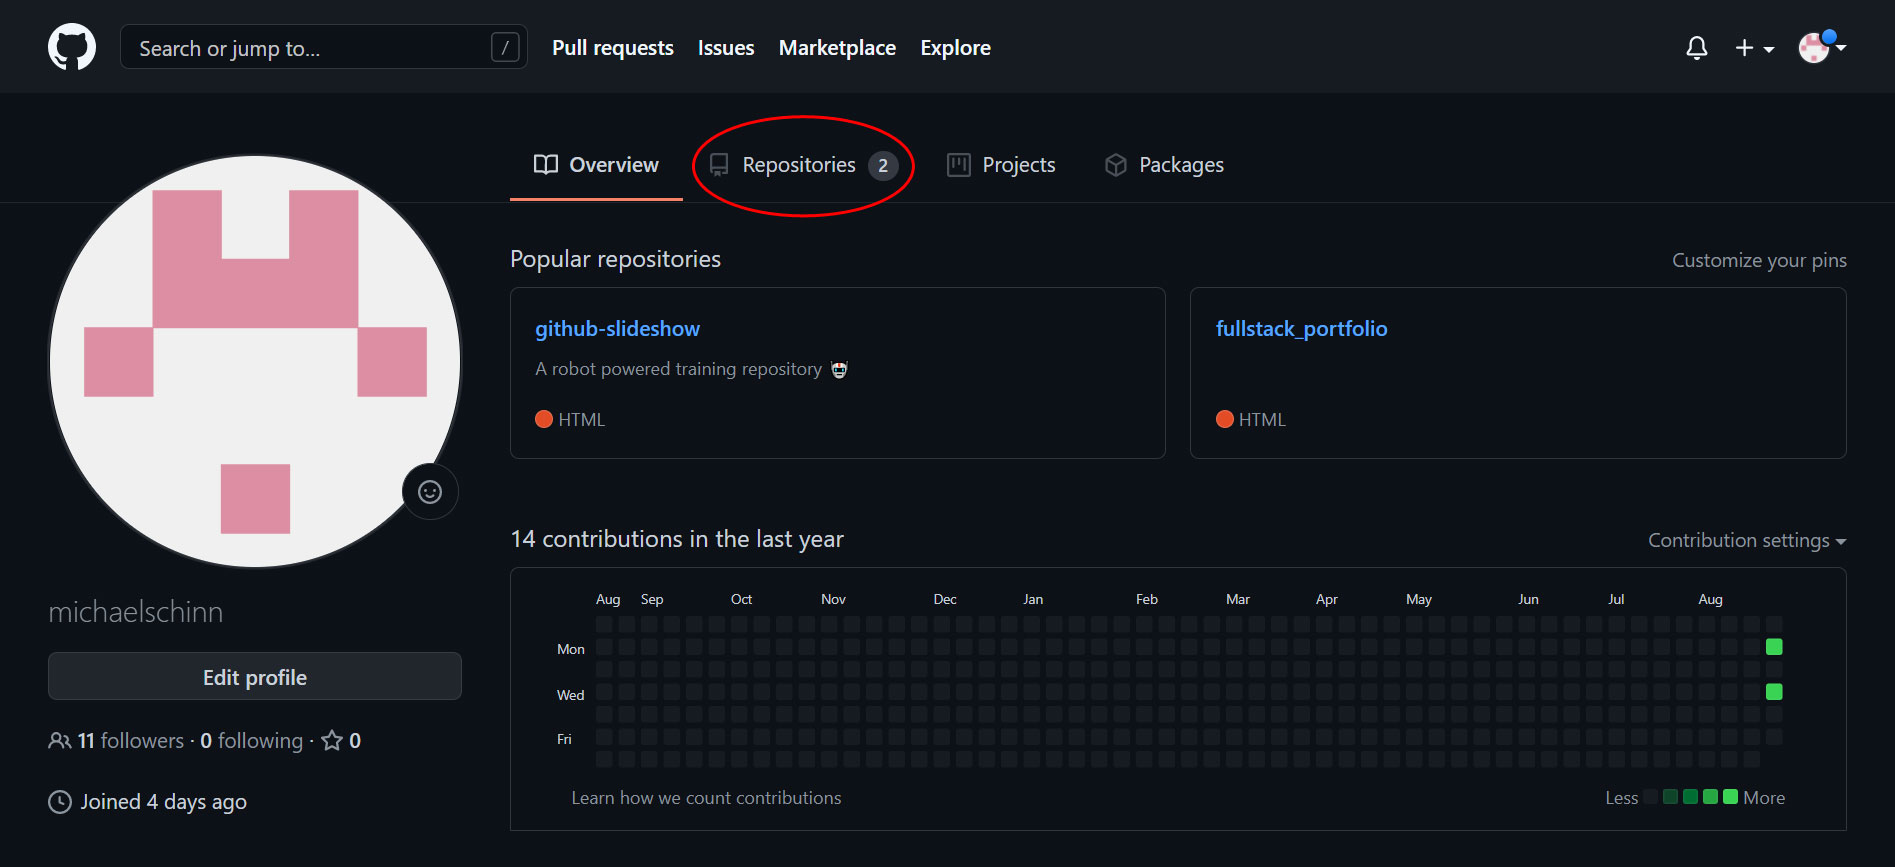
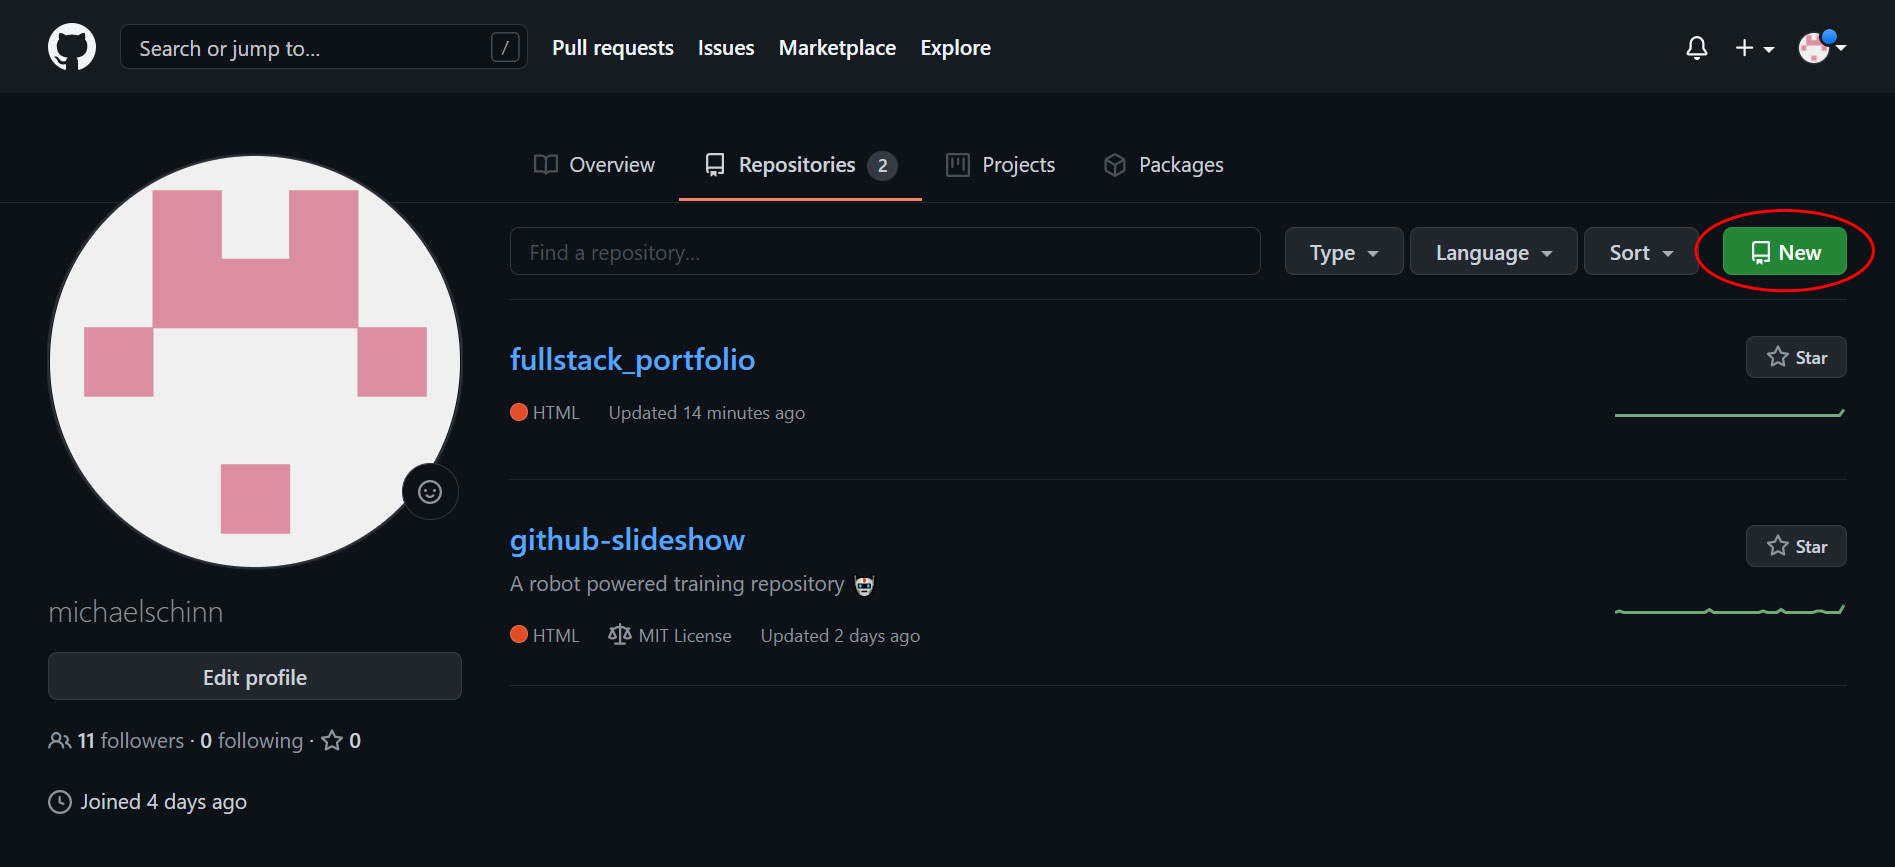
Create an Empty Repository on The GitHub Server
When you first login to GitHub you will be on the "Overview" tab. From here you will want to navigate to the "Repository" tab.
Overview tab.
From the Repository page, click on the "New" button.
Repository tab.
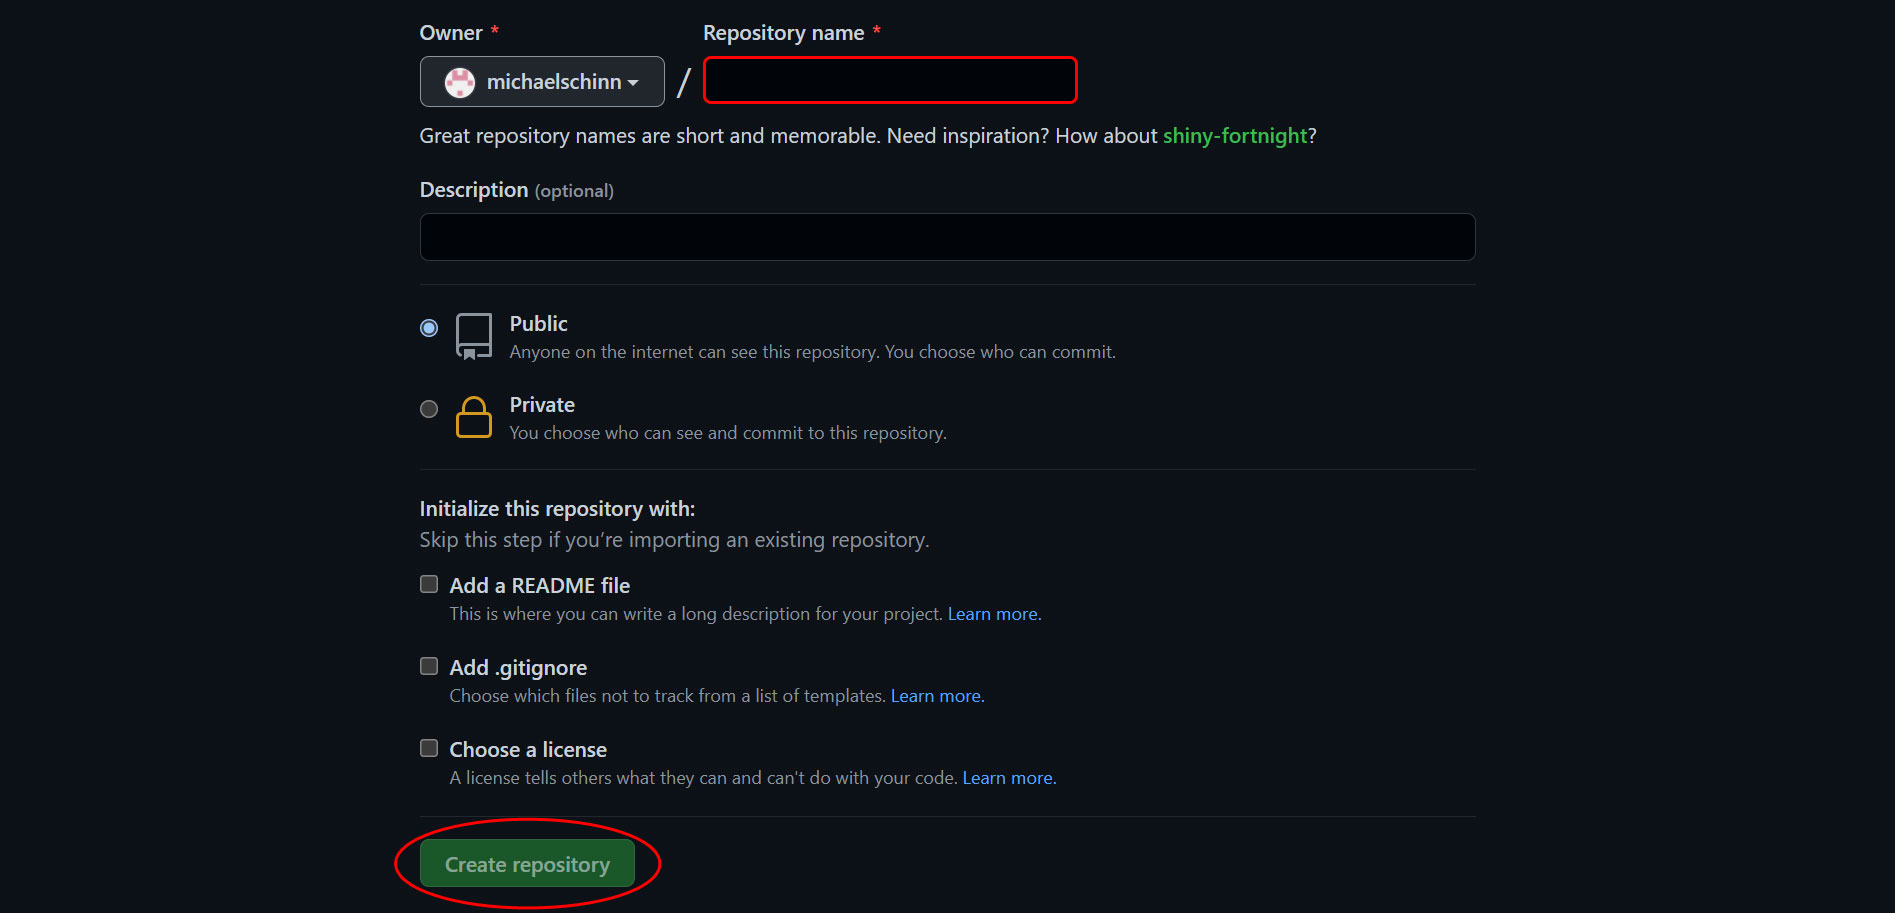
Here you will give your new repository a name and select any additional options for it.
(Note: Name is the only required field for creating a new repository.)
With the name field filled out, you can now click the "Create repository" button.
New repository page.
And thats it! GitHub will automatically redirect you into your new repo. You can start pushing and pulling content from your development environment to your new repository!
Now we will go back to your CLI so that we can start wrapping up the setup for your new repository.
Setup Your Branch
Next we need to set the active branch that Git will use to the name of the branch we will be pushing our inital content up to. This is where we use the command...
$ git branch -M main
What the git branch command does is "List, create, or delete branches" ⁷a. the option -M ⁷b is a combination of two options:
-
--move : "Move/rename a branch and the corresponding reflog." ⁷c
--force : "Reset 'branchname' to 'startpoint', even if 'branchname' exists already." ⁷d
So in essence, this will create a new branch in our development environment and sets it's name to be main.
Assign Your Origin URL
Next we need to setup which repository to track at a remote location. Specifically we want to track our new repository on GitHub. To do this we will use the command...
$ git remote add origin URL
With this command we can "Manage set of tracked repositories" ⁸a. The add command will "Add a remote named 'name' for the repository at 'url'." ⁸b() In this case our 'name' will be origin, and our remote repository will be the URL to our repo on GitHub!.
We can easily obtain the URL by going to the "Code" tab for our repo on GitHub. Then we simple click on the green "Code" button and when the context menu drops down, we click the copy to clipboard button located next to the input field with the URL in it.
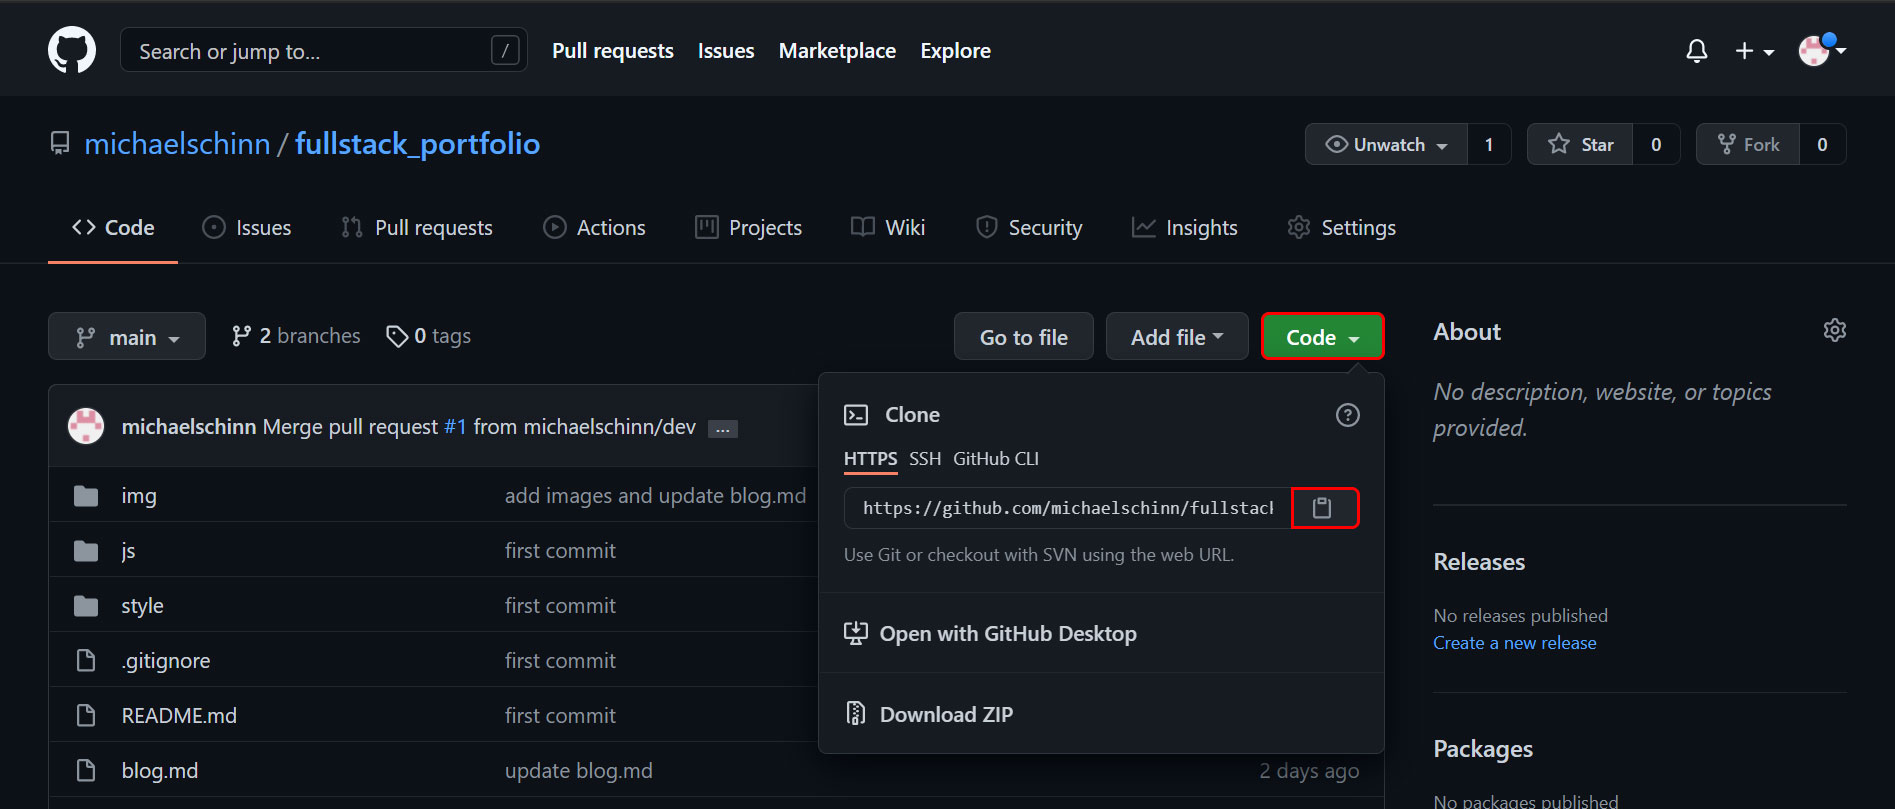
Copy repository URL
Push Your New Content Up to The GitHub Server.
You are finally ready to populate your GitHub repo with content from your development environment! To do this all you need to do is execute the command...
$ git push -u origin main
This command will "Update remote refs along with associated objects" ⁹. In other words, it will push all of the changes you have committed upstream (-u), to the main branch of your GitHub repository located at the URL stored in origin.
Your CLI will prompt you for your GitHub username and password. Once entered your changes will be pushed up to your GitHub repo!
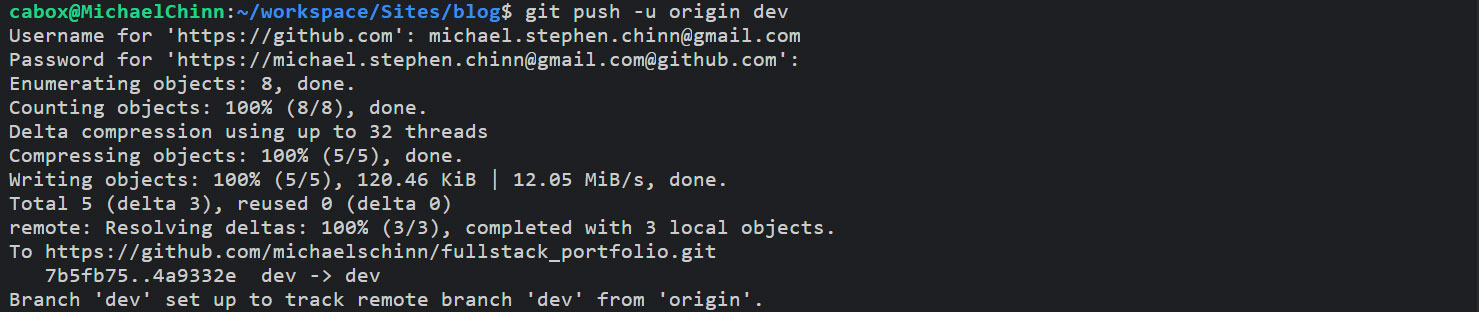
Git push output
You can set up a SSH Key to get around having to enter your credentials in everytime you make a push. This great video from Awesome Inc's Ian Rios demonstrates how to achieve this.
Create a Dev Branch
Now that we have some content up on the GitHub server we can create a development branch to work off of. This way we can make changes to our files and commit them to the server without affecting our main branch. This will provide a buffer for us, just in case there are any mistakes or errors in our changes.
This is done on the GitHub website on the repository's page, under the "Code" tab.
Once there, click on the branch dropdown button. It will be set to main by default.
Now click inside the text input box and enter in the name of our new branch, in this case "dev".
Lastly, click "Create branch dev from 'main'".
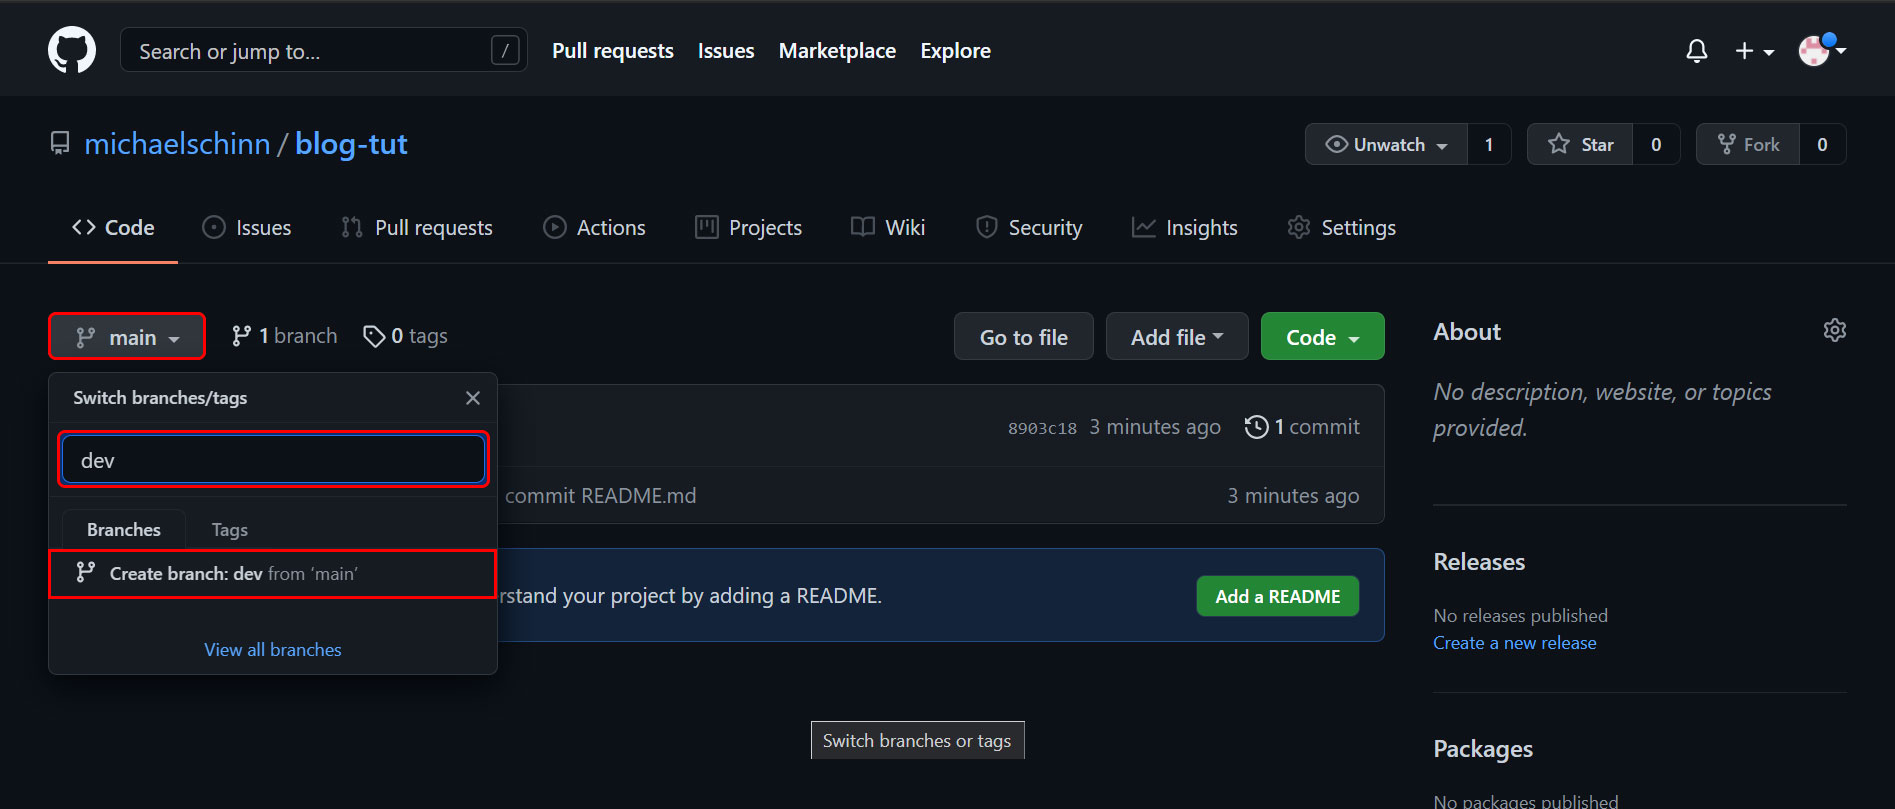
Create dev branch
GitHub will create your new branch and redirect you to that branches page. You can verify that it successfully created your new branch by looking at the branch dropdown button. It should read "dev" now instead of "main".
Make Changes, Add, Commit, Push, Wash Rinse and Repeat.
It is time to get used to the development cycle. To start let's add some content to our empty README.md file.
                  | Name | Date | Description |

                  |---|---|---|

                  | Michael Chinn | 8/30/2021 | This is a generic description. |
Now that we've made some changes its time to execute commands we have already touched upon.
                  $ git add -A


                  $ git commit -m "Updated README.md"


                  $ git push -u origin dev
Enter your username and password and that's it! You will just repeat this process of add, commit, and push until you are satisfied with all of the changes you have made.
Next we shall dive into the process of taking the work performed in your dev branch and getting it to the main branch.
Execute a Pull Request on Your Content.
Now that we have pushed our content up to GitHub, we can create a pull request. With the pull request we can "Fetch from and integrate with another repository or a local branch" ¹⁰. In other words you will pull the content from your dev branch to your main branch. This is done from the GitHub website.
From here we can click on the compare an pull request button.

GitHub pull request.
Merge Your Changes Into the Main Branch.
What's really Awesome is that in the past, I never learned to use the GitHub website beyond cloning repos and viewing files. The majority of my experience with it was through a CLI, so it was a real treat to learn the ins and outs of it.
I thank God that I have access to all of the knowledge and experience of the instructors. I can tell that the Bootcamp is going to be a real game changer for me. :)